Tuesday, April 29, 2014

Papercut deer in the woods card

Our friends were getting married up in Trinity Alps, so it seemed fitting to make a papercut of two loving deers in the woods.

2013-06-11 18.26.37

I wish I had a picture of my sketch, but I didn't have enough foresight to take a photo of it. Anyhow, I just looked at a photo online and sketched it then cut it out using my exacto knife. Here I used 32lb cotton paper by Southworth. Love their paper for paper cutting!

2013-06-11 18.27.31

Just the inside, nothing fancy. Ran out of time making the front to get fancy on the inside!

Monday, April 28, 2014

Paint chip art

2013-04-18 17.26.19

Paint chips. Everytime I go to the hardware store, I can't manage to leave without a couple of paint chip samples.  At some point, I had enough to make this fellah.

2013-03-08 10.02.08

I used an exacto knife to cut these. You have to be careful with these paint chips because...well...they can chip while you are cutting it. You can sort of see if around the beak.

2013-03-08 18.05.37

I used a hole puncher for the smallest yellow circles. The rest were cut using a pair of small pointy scissor. I used both glue and double sided adhesive to mount all the pieces onto an acid free 12 x 12 scrapbooking cardstock and framed it using Ikea's ever-so-popular Ribba Frame. The glue was used for the small circular punch outs and the double sided adhesive was used on the rest. I found that the glue made the paper a bit wrinkly. But that could also be attributed to the fact that I was craft glue with a high water content because I was too lazy to find my fabri-tac.

Monday, April 21, 2014

Freezer paper Star Wars stormtrooper tshirt

2014-04-15 08.19.22 

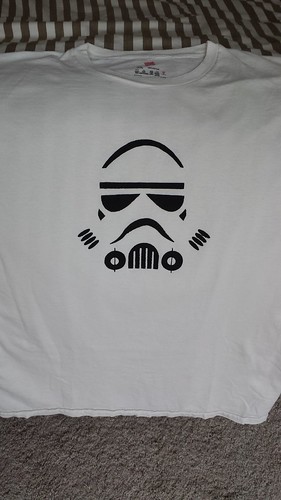
I made this stormtrooper tshirt for my star wars loving husband using the freezer paper method.

2014-04-14 08.31.55

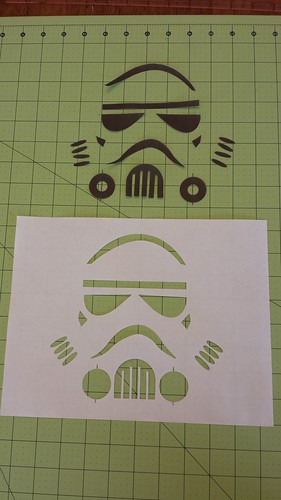
First, I cut up freezer paper to 8.5" x 11" and flattened it out so I can feed it through my printer. I found this image online and resized it to make it larger for the t-shirt. I was pleased to find it successfully printed instead of seriously jammed into my printer. IMPORTANT: Print on the matte side, NOT the shiny side.

2014-04-14 09.14.54

Next, I cut it out using an exacto knife. Save the little white cut out from the orb part of this cut out. you'll need to iron the little pieces in place.

Which reminds me, I really really really want to get the silhouette cameo!  If you don't know what it is, google it. You won't regret it.

2014-04-14 09.58.10

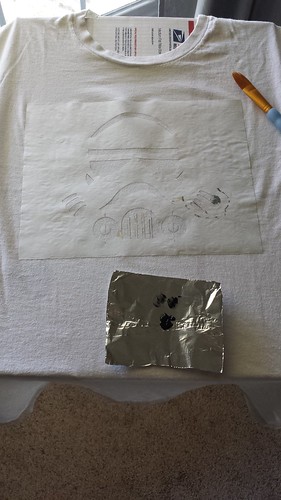
I ironed this on using a low setting. Make sure you iron the shiny side down. That has the wax that adheres to the t-shirt. And apparently, no this is not the same as wax paper. I did my research :)

Iron it down as best as you can. Test all the edges with your finger.

2014-04-14 10.09.43

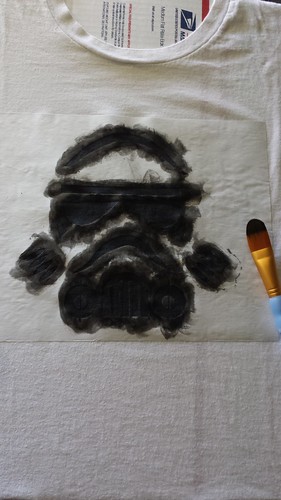
I used a brush and brushed it on using ...well a brushing motion. Later, I learned that it's best to use a stippling motion with a stiff brush. Or use a foam brush. I used whatever I had on hand. 

I used scribbles paint from JoAnn. It's permanent fabric paint, and it's supposed to be used as puffy paint but the store associate says you can use it as regular paint with a brush. The only thing that makes it puffy is the way it squeezes out. Who knew? And it was the only thing available at the particular store I was in...so I just went with it.  I found that it was very wet and thin. Not as viscous as I was expecting but this is the first time using fabric paint so I don't know what it is supposed to be like. The larger stores have a bigger and better selection. Next time...

Diaper Cake

One of my good friends is pregnant and I finally had the opportunity to make a diaper cake! I looked around online for directions, and there are so many different ways to make them.  There really is no cookie cutter method for making diaper cakes, especially with the decor.  I found out her baby shower was during the time my husband and I were going to be in Portland so I had to rush and get this diaper cake done with very little time and direction.

We bought a box of diapers at Costco (size 1-2) and used one entire half of the packaged diapers with about 4 left over. I didn't have rubber bands so I hand tied each rolled diaper with twine.  For the middle, I unrolled a half used paper towel roll and used the center as...the center for the cake! Some people used baby shampoo. I would have done that if I wanted to run to the store for the 4th time for the cake, but I was strapped for time.

Her baby shower theme was pink and gray. I'd say I did a pretty good job with the time and resources I had!


2014-03-23 15.22.46  2014-03-23 15.23.15

Back from unplanned hiatus...maybe?

So life happened. Quit my job to take prereq classes to apply to grad school. Successfully got into grad school. Now that is my life and there's hardly any time. Still, there is still somehow some traffic coming in on this site. Not much, but it's better than a big fat zero! I initially stopped posting because it was taking too much of my time and I just don't have that luxury during this time anymore. Now, I've resolved to posting pictures I've taken on my phone (read: poor quality) versus taking them on my dslr, then post processing the photos. It cut outs a lot of time and I will be able to share in the little crafts I do on the off chance I have this thing called "leisure time."  I'll be posting more frequently to catch up and share many crafts I've done in the past year or so.  

Oh, and there will be less tutorial-like posts unless I am asked to explain or share for the sake of time. This also means I won't be editing or proof reading my posts as I once did before, so please excuse all typos! 

Thank you all for following along!

xoxo, 
Vicky
Related Posts Plugin for WordPress, Blogger...