Sunday, April 22, 2012

Wedding invitations - WIP -

Aside from planning my own wedding and finally finishing up all the crafty tid bits I committed to, I took on another project. Insane, I know. One of my dear childhood friends is getting married this year, too, and I decided that I would make her invitations as her wedding gift. All 200+ of them...from start to finish. I started off showing her a couple of designs (chevron, brackets, polka dots...) once she gave me an idea of what she liked. Ultimately, we ended up with:

invitation design_ab

And no invitation is complete without a monogram:

monogram_ab

Saturday, April 21, 2012

Super easy fried chicken

Easy fried chicken leg meat

My mom always makes the tastiest fried chicken at home, and effortlessly at that. Turns out, all you need is this secret ingredient: 

Easy fried chicken leg meat

You can find sweet potato powder at your nearest Asian grocery store, 99 ranch market for us. No real recipe here.  I used skinless, boneless leg meat and marinated it with sea salt and fresh ground pepper in the refrigerator for 30 minutes.

Easy fried chicken leg meat

Directions? All I did was blindly pour the powder in the super Asian plate my mom gave me (I really need new prep plates) and coat the pre-seasoned chicken leg meat.

Easy fried chicken leg meat

Friday, April 20, 2012

Garlic spinach and mushroom

Sauteed garlic mushroom and spinach

I have been trying to cook more lately because I was sick of eating the same 5 things my mom made and gave us in large quantities.  Don't get me wrong, I love free food (who doesn't?) but it gets to be too much when it's all you eat. We ended eating the same thing for days, not finishing the food and throwing it away.

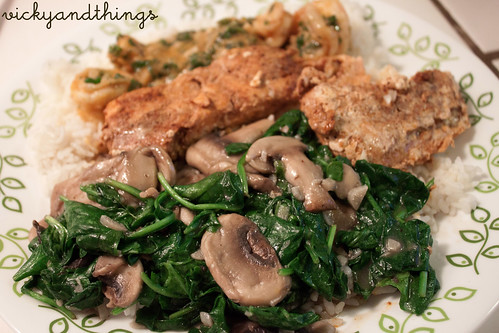
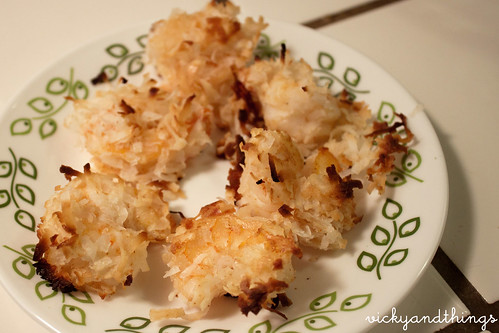
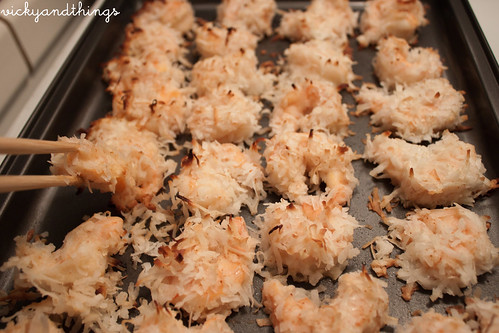
Sometimes I follow recipes and then there are nights like these, where there's left over fresh produce and I throw something together. Today, it ended up being pretty good, so I thought I'd share this super easy sauteed dish! (The food in the background: garlic-chili crusted salmon and thai coconut curry shrimp-recipe on salmon to come)

Ingredients:

8 oz mushrooms
4 cups of baby spinach
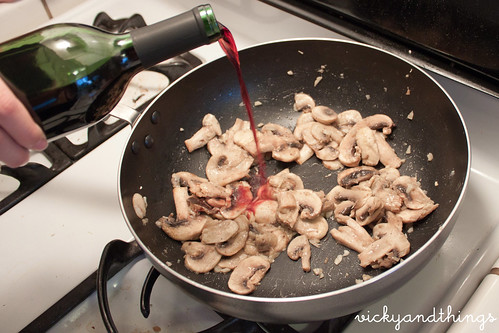
2 tbs red wine
1/2 head of garlic, minced
1.5 tbs butter
1.5 tbs flour

Directions:

1. Melt the butter slowly in pan, when all is melted, throw in the garlic and saute for a minute
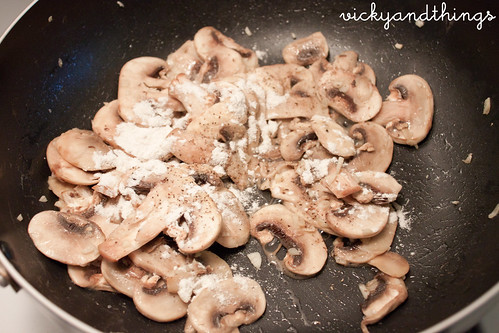
2. Just as the garlic is turning a tad golden, throw in the mushrooms, saute for 3-4 minutes until almost soft
3. Sprinkle flour over, saute for 1 min

Sauteed garlic mushroom and spinach

4. Add wine, cook for 1-2 mins

Sauteed garlic mushroom and spinach

5. Toss in spinach and cook until spinach is almost all wilted and immediately dish

Thursday, April 19, 2012

Baked Coconut Shrimp

Baked coconut shrimp

Ingredients:

1 lb of large shrimp, peeled and deveined
1/4 cup of corn starch
2 tbs of flour
1/2 tsp cayenne pepper
2.5 cup sweeten coconut flakes
2 egg whites, beaten till foamy
1 tbs olive oil

Directions:

1. Preheat the oven to 400 degrees
2. Spread baking sheet with olive oil (I used my Misto)
3. Rinse shrimp and dry with a paper towel
4. Combine corn starch, flour, cayenne pepper in a bowl
5. Pour coconut flakes in a separate bowl
6. Dredge shrimp in dry ingredients first, dip it into the egg whites, then roll it in the coconut
7. Place shrimp on baking sheet and repeat for the rest of the shrimps

Baked coconut shrimp

8. Bake shrimp for 10 minutes, take it out and flip them all over, and put it in for an additional 10 minutes

Baked coconut shrimp

Sunday, April 15, 2012

WIP: Appliqué quilted tree leaves guestbook

heart tree

Sifting through all the creative and unique ideas for our wedding guestbook, I finally found something we loved and wouldn't just end up collecting dust in the garage or attic. We loved the thumbprint guestbook ideas, but we really didn't think we'd want to hand a poster up forever and the transportation of the poster from California to Maui would be more difficult. In comes the quilted tree! My future MIL is graciously helping for this project as she is a quilter and knows appliqué. I've only watched youtube videos and am pretty sure it'll come out look like my 8th grade sewing projects. I'm responsible for the look and design of the tree and it'll be handed off once I have ironed on the design to look similar to the inspiration photo above.

Materials:

Fusible wedding (I used Pellon Wonder-Under)
Iron
Fabrics
Cardstock


Guestbook tree quilt

1. Cut out the shape of your leaves on the card stock as your template
2. Use your template and trace leaves on the smooth side of the fusible webbing

Guestbook tree quilt

3. Prepare the iron and cut out the whole piece of webbing sheet that contains the leaves. Do not cut out each leaf yet. I drew them as close as possible as white space is just wasted webbing.

Guestbook tree quilt

4. Iron on the wrong side of the fabric to the rough side of the webbing. Make sure the iron is clean on the bottom.

Guestbook tree quilt

5. Once webbing is adhered, cut out each leaf.

Guestbook tree quilt

This is roughly what the quilt or pillow will look like. Since we are having a destination wedding, this is the easiest and lightest item to transport. No other parts of the tree will be coming (or made) with us, just the leaves. The guests will be asked to sign the leaves with a permanent fabric marker and there is enough space for a little message.

Warning: Do not use a sharpie marker for fabric expecting it to stay. Trust me.

Sunday, April 8, 2012

Paper cut table numbers completed

Remember those paper cut table numbers I started to make for our wedding and even posted a tutorial on? Yeah, that one. Well, I finally finished and made the last two! Making the total a whopping four!

Paper cut table numbers

I have finally finished up many of the projects I started for our wedding about half a year ago. I have this problem of starting one great idea, then leaving it after its half completed and not getting back to it till weeks/months/years later. The fact that these projects tie into our wedding in May is driving motivation to actually complete them in a timely manner.

Paper cut table numbers

I practically demanded we have no more than 4 tables because I dreaded making a whole other number.

Friday, April 6, 2012

DIY Luggage tags

DIY luggage tags

Since my last DIY luggage tags post, I finally completed all of them! Yellow are for the ladies, and grey are for the gents. I made the tags myself using Microsoft Word and retrieved the airplane image from somewhere on Google. If you are interested in the template, email me and I'll be happy to share!

One tip on making these luggage tags, don't push out the corners TOO much. I made the mistake of doing that and some of the corners look like they are flared out. But I'm not about to remake fifty of them. Happy Friday!
Related Posts Plugin for WordPress, Blogger...